Contacts
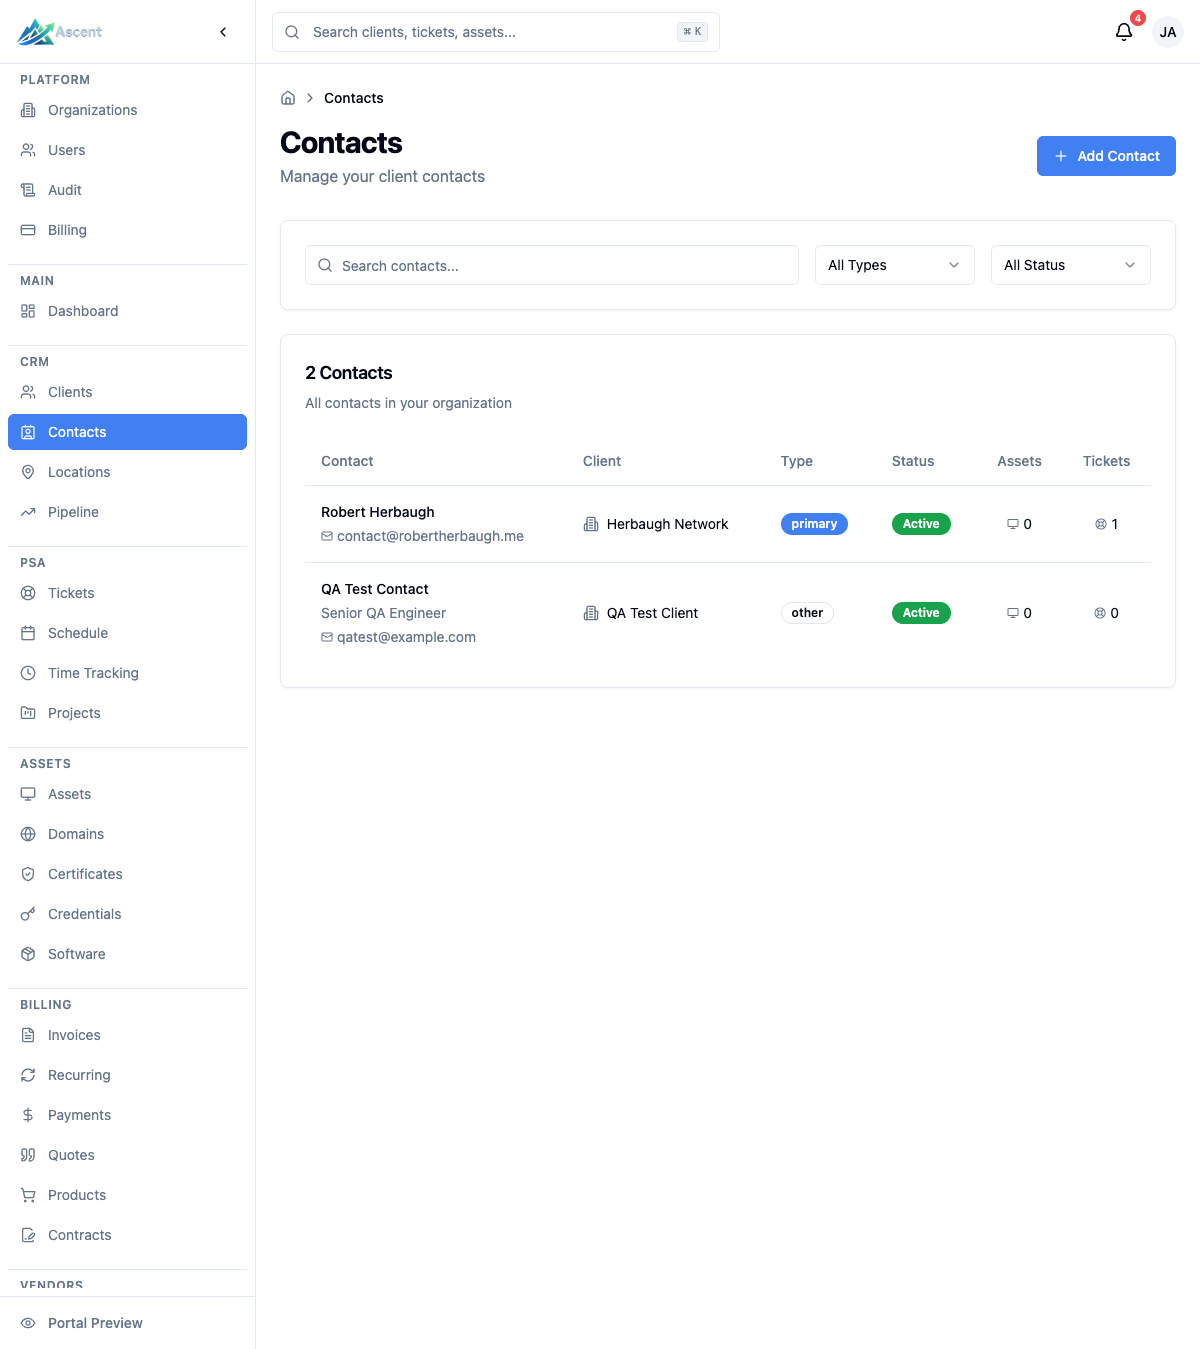
Contacts represent the individual people at your client organizations — the people you communicate with for support, billing, and technical matters. Every contact belongs to exactly one client.
Overview
The Contacts module lets you:
- Store names, titles, departments, and contact details for the people at each client
- Classify each contact by type (Primary, Billing, Technical, Emergency, or Other)
- Associate a contact with a specific client location
- See how many assets and tickets are linked to a contact
- Grant client portal access so a contact can sign in to view their tickets and assets
- Track a communication history of notes, ticket replies, and ticket activity
Navigate to Contacts
Go to CRM → Contacts (/contacts) to see all contacts in your organization.
List view
The contacts table shows one row per contact with the following columns:
| Column | Description |
|---|---|
| Contact | Name, job title, and email/phone (when present) |
| Client | The client this contact belongs to (links to the client) |
| Type | Contact type badge (Primary, Billing, Technical, Emergency, Other) |
| Status | Active or Inactive |
| Assets | Number of assets assigned to the contact |
| Tickets | Number of tickets linked to the contact |
Filtering and searching
Use the filter bar above the table:
- Search contacts… — matches against name, email, phone, or title
- Type — All Types, Primary, Billing, Technical, Emergency, or Other
- Status — All Status, Active, or Inactive
Results are paginated 25 per page. If you have a client selected in the global client filter, the list is scoped to that client automatically.
Contact types
| Type | Notes |
|---|---|
| Primary | Main point of contact; primary contacts receive important communications |
| Billing | Handles invoicing and payments |
| Technical | Technical point of contact |
| Emergency | Emergency / after-hours contact |
| Other | General contact |
Creating a contact
- From the Contacts list, click Add Contact (or open a client and add a contact from there to pre-select the client).
- Under Client, select the client this contact belongs to. A client is required.
- Under Personal Information, enter:
- Full Name (required)
- Job Title
- Department
- Under Contact Details, enter:
- Email Address
- Office Phone
- Mobile Phone
- Optionally add free-text Notes.
- In the sidebar, set the Contact Type (defaults to Other), choose a Location (locations load once a client is selected), and toggle Enable portal access if this person should be able to sign in to the client portal.
- Click Create Contact.
Contact detail page
Click a contact to open their profile. The header shows the contact's name, title, type badge, active status, and a Portal Access badge when portal access is enabled. From the header you can go Back, Edit the contact, or Delete it (deleting requires the appropriate permission).
A stats row links out to the contact's Assigned Assets, Tickets, and Client.
Tabs
| Tab | What it shows |
|---|---|
| Overview | Contact information (email, office/mobile phone, department, location) and notes |
| Communication | A timeline of notes, ticket replies (marked inbound/outbound), and ticket activity for this contact |
| Tickets | Tickets linked to the contact, with a button to create a new ticket |
| Assets | Assets assigned to the contact, with a button to add an asset |
| Checklists | Checklists attached to the contact |
Details sidebar
The right-hand Details card shows the client, contact type, portal access status, and the created/last-updated dates. Any Tags assigned to the contact appear in a separate card below it (when the contact has tags). The Quick Actions card provides shortcuts to Create Ticket, Call Contact (when a phone number is set), set up or reset the portal password (when portal access is enabled), and Impersonate Portal User (when you have the impersonate permission).
Location assignment
A contact can be tied to one of the client's locations:
- Open the contact and click Edit.
- Choose a Location from the client's available locations (or No location).
- The location appears on the contact's Overview tab and links to the location record.
If the client has no locations defined yet, the location selector indicates that none are available.
Client portal access
Contacts are how external client users sign in to the client portal. When Enable portal access is on, the contact can be granted credentials:
- Set Up / Reset Portal Password (in Quick Actions) lets you either email a password reset link to the contact or generate a temporary password to share directly. Emailing a reset link requires the contact to have an email address.
- A contact with portal access enabled but no portal account yet shows Enabled (pending setup) under Portal Access until the password is set.
- Impersonate Portal User opens a session as the contact for troubleshooting. This requires the impersonate permission, the contact must have portal access enabled, and portal impersonation must be allowed for the client.
Portal access fields exist on the contact record (including portal MFA), so a single contact maps to a single portal login.
Co-managed IT access
For a client's internal IT staff who collaborate with you inside the portal, you can grant a contact Co-Managed IT Access. A co-managed contact sees all of their company's tickets — regardless of their contact type — and can triage them (set priority, status, and category) from the portal. Each triage change is recorded on the ticket's history, attributed to the portal contact.
- The Co-Managed IT Access switch appears on the contact's Edit form, in the same card as Enable portal access. Turn portal access on first; the co-managed switch is enabled only when portal access is enabled.
- The switch is only shown when your plan includes the co-managed access license feature (Enterprise tier). If your plan doesn't include it, the option is hidden, and attempting to enable it through the API returns a "not available on your current plan" error.
- Co-managed access affects tickets only. It does not change a contact's visibility for documents, invoices, quotes, contracts, or assets — those still follow the contact-type visibility model.
- It is off by default and set per contact, so you choose exactly which client IT staff get this broader access.
Moving a contact to another client
A contact belongs to exactly one client, but you can move it:
- Open the contact and click Edit.
- Change the Client selection to the target client.
- Save. Because the client changed, the contact is moved to the new client.
Deactivating and deleting
- Deactivate — To keep a contact's record and history while marking it inactive, open the contact, click Edit, and turn off the Active toggle in the Settings card. Inactive contacts are hidden from contact dropdowns but kept for history, and can be reactivated later by turning Active back on.
- Delete — The Delete button (which requires the appropriate permission) permanently removes the contact and cannot be undone. The API requires a contact to be deactivated before it is permanently deleted, so the Delete action deactivates the contact first and then removes it for you.
Communication
- Email — On the contact's Overview tab, click the email address to start an email (
mailto:). - Phone — Click the office or mobile number to start a call (
tel:) where supported by your device.
Best Practices
- Always pick the right client — Every contact must be linked to a client; choose carefully since moving requires an edit.
- Set accurate types — Use Billing, Technical, and Emergency types so the right people get the right communications.
- Enable portal access deliberately — Only turn on portal access for contacts who should sign in, and use the reset-link option so they set their own password.
- Keep details current — Update titles, departments, and locations when roles change.
- Deactivate instead of deleting — Deactivating preserves ticket and communication history; reserve permanent deletion for true duplicates or mistakes.