Tickets
Tickets are the heart of your service delivery in Ascent. They represent support requests, issues, and work items that need to be addressed.
Overview
The Tickets module provides:
- Centralized ticket management
- Priority and status tracking
- SLA management
- Email integration
- Time tracking
- Communication history
Viewing Tickets
Navigate to PSA → Tickets to see your ticket queue.
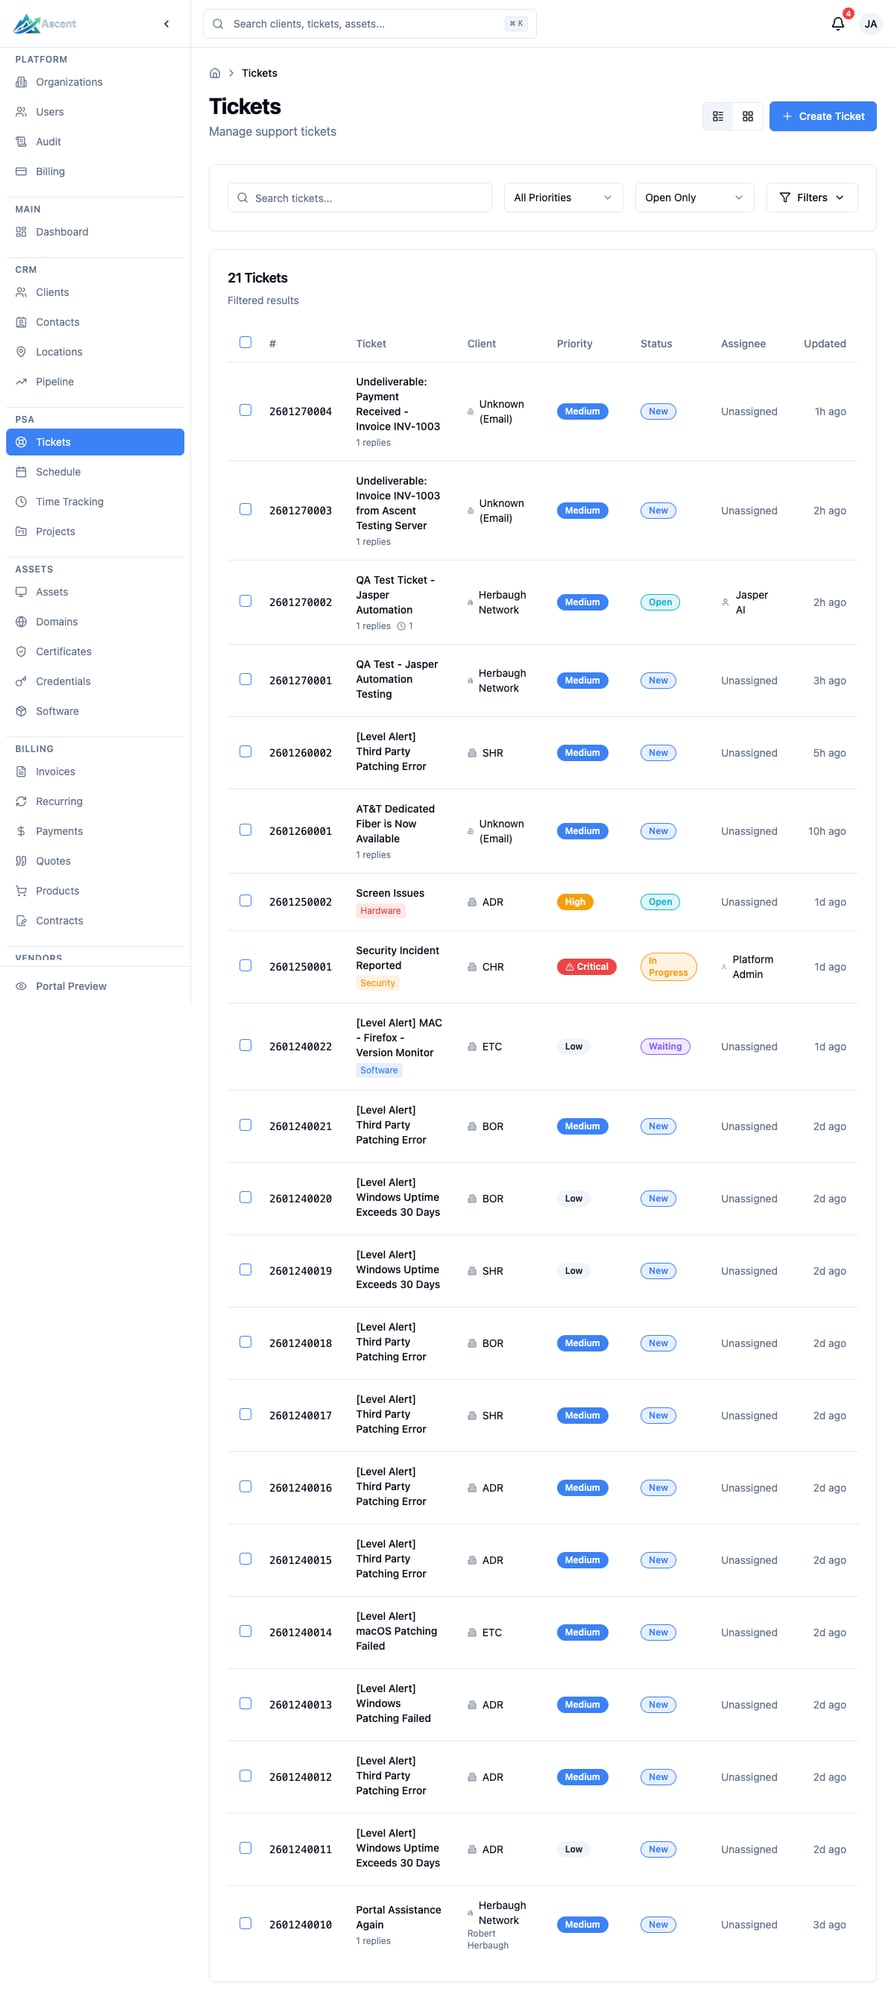
List View
The ticket list displays:
| Column | Description |
|---|---|
| # | Ticket number (e.g., TKT-2601270001) |
| Ticket | Title/subject of the ticket |
| Client | Associated client |
| Priority | Critical, High, Medium, Low |
| Status | New, Open, In Progress, Waiting, Resolved |
| Assignee | Team member assigned |
| Updated | Time since last update |
Filtering Tickets
Filter your ticket queue by:
- Priority - All, Critical, High, Medium, Low
- Status - Open Only, All, specific status
- Assignee - Unassigned, specific team member
- Client - Specific client
- Date range - Created or updated date
View Options
- List View - Traditional table view
- Grid View - Card-based layout
Creating a Ticket
From the Interface
- Click + Create Ticket
- Fill in ticket details:
- Subject - Brief description
- Description - Full details of the issue
- Client - Select the client
- Contact - Specific contact (optional)
- Priority - Critical, High, Medium, Low
- Type - Service Request, Incident, Problem
- Assignee - Team member to work on it
- Click Create
From Email
Tickets can be created automatically from emails sent to your support address. The system will:
- Create a new ticket with the email subject
- Include the email body as the description
- Attempt to match the sender to a contact/client
Ticket Priorities
| Priority | Description | Typical Response Time |
|---|---|---|
| Critical | Business-critical, total outage | 15 minutes |
| High | Major impact, significant issue | 1 hour |
| Medium | Moderate impact, workaround exists | 4 hours |
| Low | Minor issue, no urgency | 24 hours |
Ticket Statuses
| Status | Description |
|---|---|
| New | Just created, not yet reviewed |
| Open | Acknowledged, work not started |
| In Progress | Actively being worked on |
| Waiting | Awaiting client response or external party |
| Resolved | Issue addressed, pending confirmation |
| Closed | Completed and confirmed |
Working on a Ticket
Ticket Detail Page
Click a ticket to open its detail page:
Information Panel
- Client and contact details
- Priority and status
- Assignee
- SLA timer
Description
- Original request details
- Attachments
Activity Timeline
- All updates, comments, and changes
- Email correspondence
Time Entries
- Time logged against this ticket
- Add new time entries
Adding Updates
- In the Activity section, enter your update
- Choose visibility:
- Internal - Only visible to team
- Public - Visible to client in portal
- Click Add Update
Logging Time
- Click Log Time or use the time entry section
- Enter:
- Duration
- Description of work
- Billable/Non-billable
- Click Save
Changing Status
- Use the status dropdown to change status
- Or select Resolve to mark as resolved
- Add resolution notes when resolving
Email Integration
Incoming Emails
- Emails to your support address create tickets
- Replies to ticket notifications update the ticket
Outgoing Emails
- Public updates are emailed to the client
- Notifications sent on status changes
SLA Management
SLAs (Service Level Agreements) track response and resolution time:
- Response SLA - Time to first response
- Resolution SLA - Time to resolve the issue
SLA indicators show:
- 🟢 Green - Within SLA
- 🟡 Yellow - Approaching SLA
- 🔴 Red - SLA breached
Best Practices
- Acknowledge quickly - Respond even if you can't fix immediately
- Keep clients informed - Regular updates on progress
- Document thoroughly - Record all steps taken
- Use templates - Create response templates for common issues
- Track time - Log time as you work
- Categorize properly - Use consistent types and priorities